
Canon Pixma E470 Setup Step by Step Guide
Setting up a new printer can sometimes feel like a daunting task, but getting your Canon PIXMA E470 up and running is actually a breeze! Known for being incredibly ink-efficient and offering seamless Wi-Fi connectivity, the E470 is a fantastic All-in-One choice for both home and office use.
Whether you’re looking to print your kid’s school assignments or scan important documents, we’ve put together a step-by-step, easy-to-follow guide to help you set up your Canon PIXMA E470 without breaking a sweat.
Step 1: Unboxing and Physical Setup
Before we dive into cables and Wi-Fi passwords, let’s get the hardware sorted out.
1. Unbox carefully: Take your printer out of the box and place it on a flat, sturdy surface near your computer or Wi-Fi router.
2. Remove the orange tape: Canon secures its printers with protective orange tape and plastic materials for shipping. Make sure you peel off all the tape from the exterior, as well as from the scanner glass and inside the paper output tray.
3. Power it up: Connect the provided power cord to the back of the printer and plug the other end into a wall outlet. Press the Power button to turn it on. You’ll hear the printer’s internal mechanisms start to move this is completely normal.
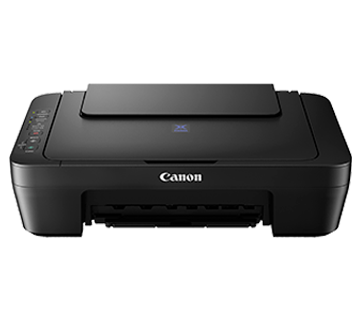
Step 2: Installing the Ink Cartridges
The PIXMA E470 uses two specific ink cartridges: a Black cartridge (PG-47) and a Color cartridge (CL-57S). Here is how you install them:
1. Open the front cover of the printer. The cartridge holder will automatically slide into the center position. (Wait for it to stop moving completely before you reach inside!)
2. Take your new ink cartridges out of their packaging and carefully peel off the protective tape. Tip: Be careful not to touch the copper-colored electrical contacts or the print head nozzles, as this can cause printing errors.
3. Slide the Color cartridge into the left slot and the Black cartridge into the right slot. Push them up gently until they click securely into place.
4. Close the front cover.
Step 3: Loading the Paper
-
Pull up the paper support tray at the top rear of the printer.
-
Slide the paper guide to the left.
-
Load a stack of standard A4 printer paper into the tray, ensuring it sits straight.
-
Adjust the paper guide so it fits snugly against the edge of the paper stack. Pull out the paper output tray at the bottom front.
Step 4: Downloading and Installing the Drivers
To get your computer to “talk” to your new printer, you need to install the correct software drivers.
1. Skip the CD (If you want the latest drivers): While your printer might come with an installation CD, the easiest way to ensure you have the most up-to-date software is to go online.
2. Open your web browser and visit the official Canon setup site (usually ij.start.canon or the official Canon support page for your region).
3. Type in your printer model: E470.
4. Download the setup file for your operating system (Windows or Mac).
5. Once downloaded, double-click the file to run the installer. Follow the on-screen prompts. When the setup wizard asks you how you want to connect your printer, choose your preferred method (USB or Wireless).
Step 5: Connecting the Canon E470 to Wi-Fi
One of the best features of the E470 is its wireless printing capability. If you selected “Wireless Connection” during the software setup in Step 4, here is how to sync it up:
1. Make sure your printer is turned on.
2. On the printer’s control panel, press and hold the Wi-Fi button until the power lamp flashes once, then release it.
3. Press the Color button, followed by the Wi-Fi button again. The Wi-Fi lamp will start flashing quickly, indicating that the printer is actively searching for your router.
4. Head back to your computer screen and follow the remaining steps in the Canon setup wizard to select your network and enter your Wi-Fi password.
5. Once connected, the Wi-Fi light on the printer will stay solid blue.